Export iCloud Desktop usage guide
Follow the desktop workflow from first launch to export completion. This guide uses the real app screenshots so users can match each step on screen.
Before you begin
- Install the desktop app for Windows or macOS from the homepage.
- Make sure you can access your iCloud account and any two-factor code you may need.
- Choose an export folder with enough free disk space for your photos and videos.
Launch the desktop app
Start Export iCloud Desktop and wait for the startup screen to finish. The app will open into the main desktop workflow after initialization completes.
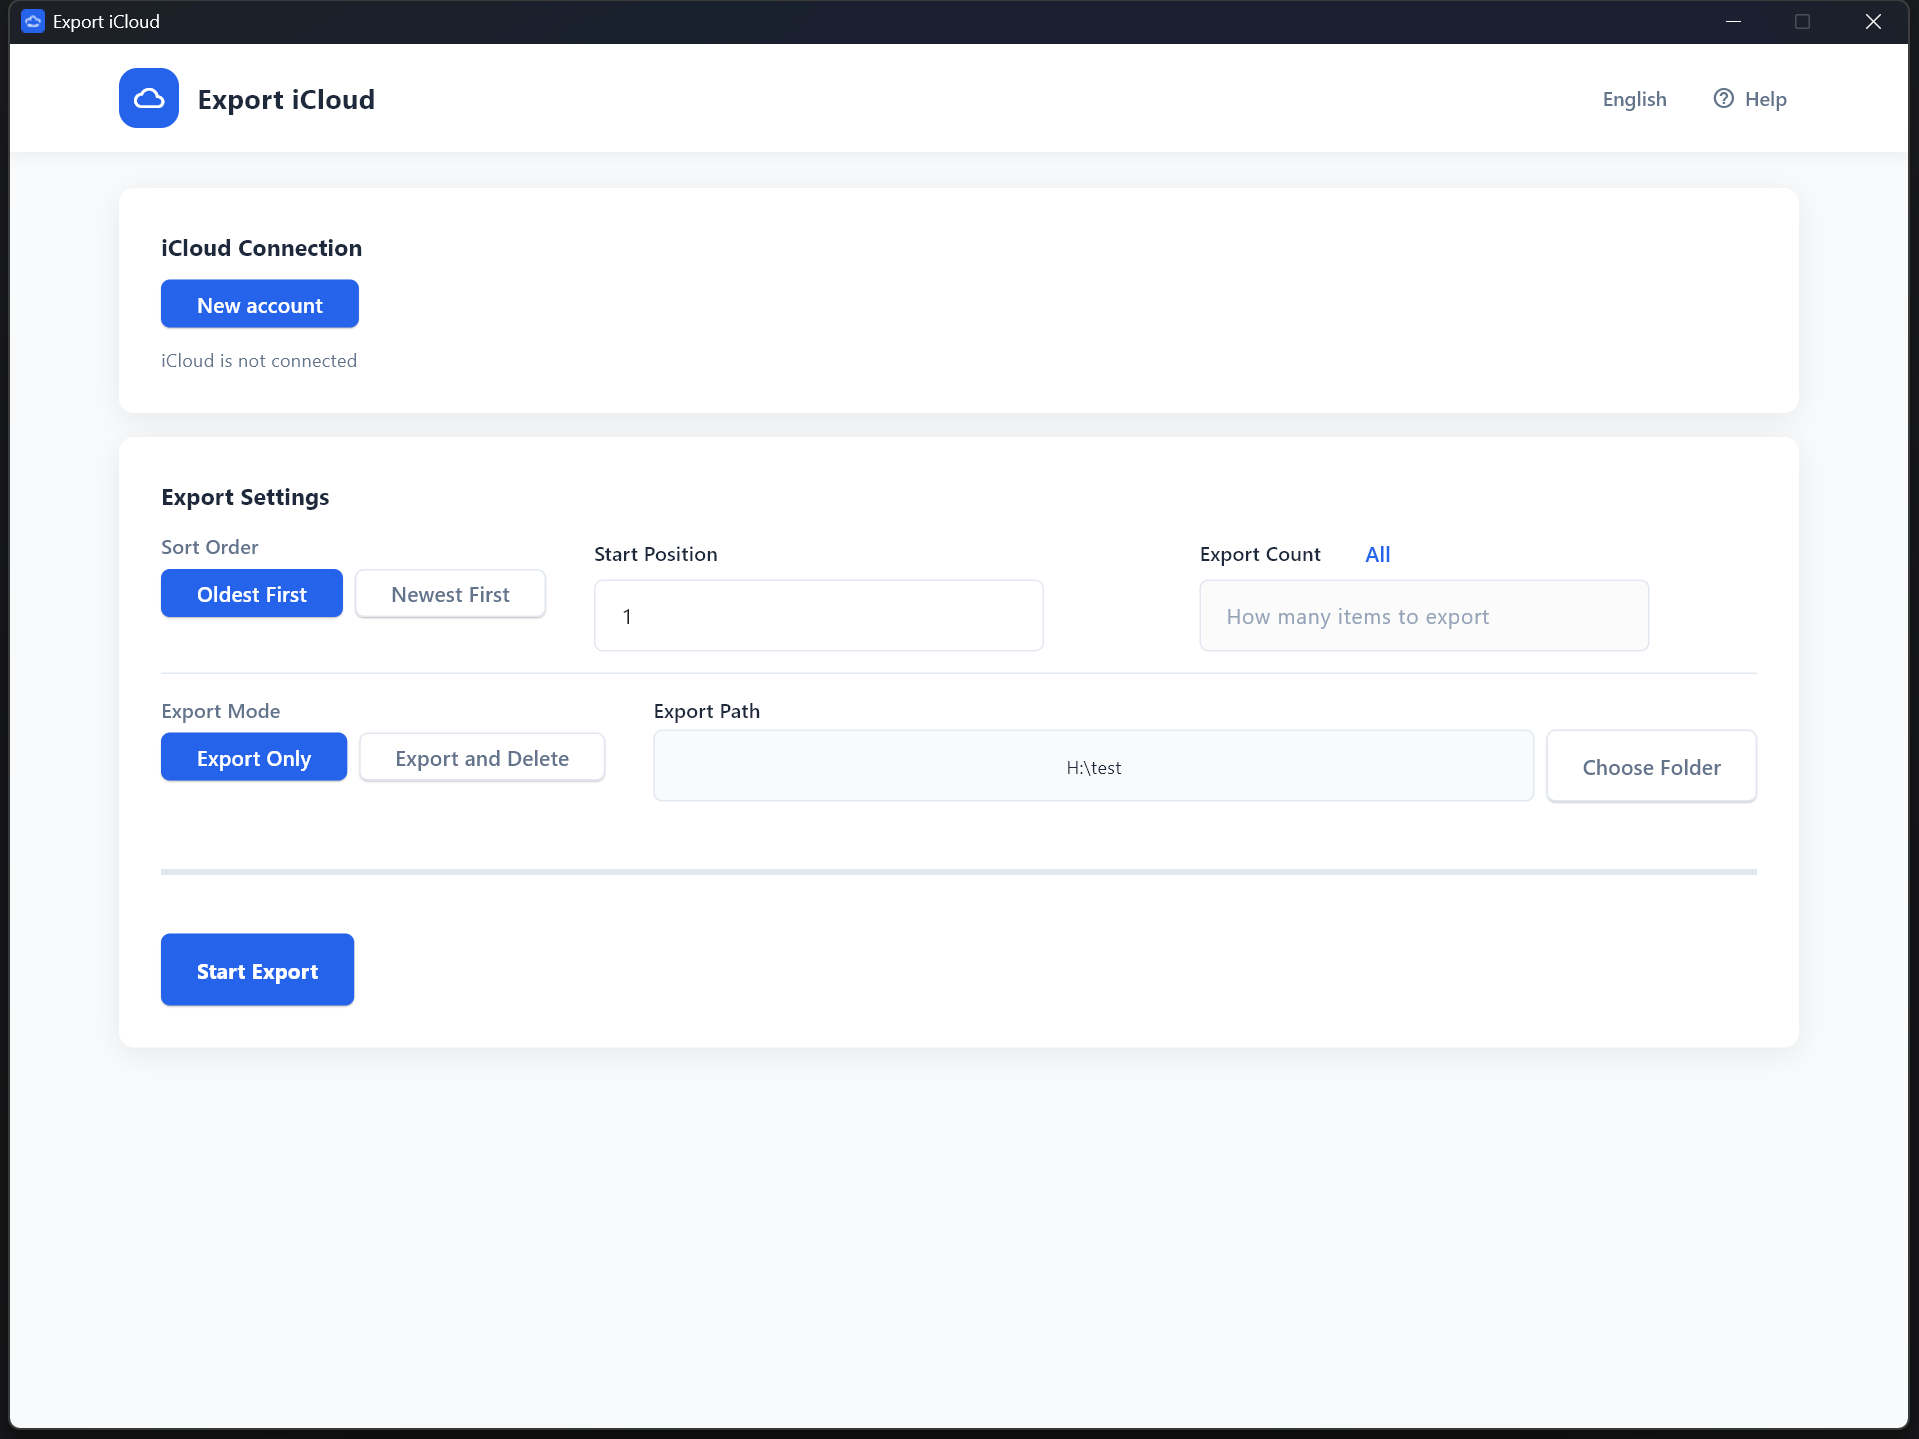
Connect to iCloud
Enter your iCloud account details in the app and begin the connection flow. This creates the desktop session used for export, subscription checks, and quota tracking.

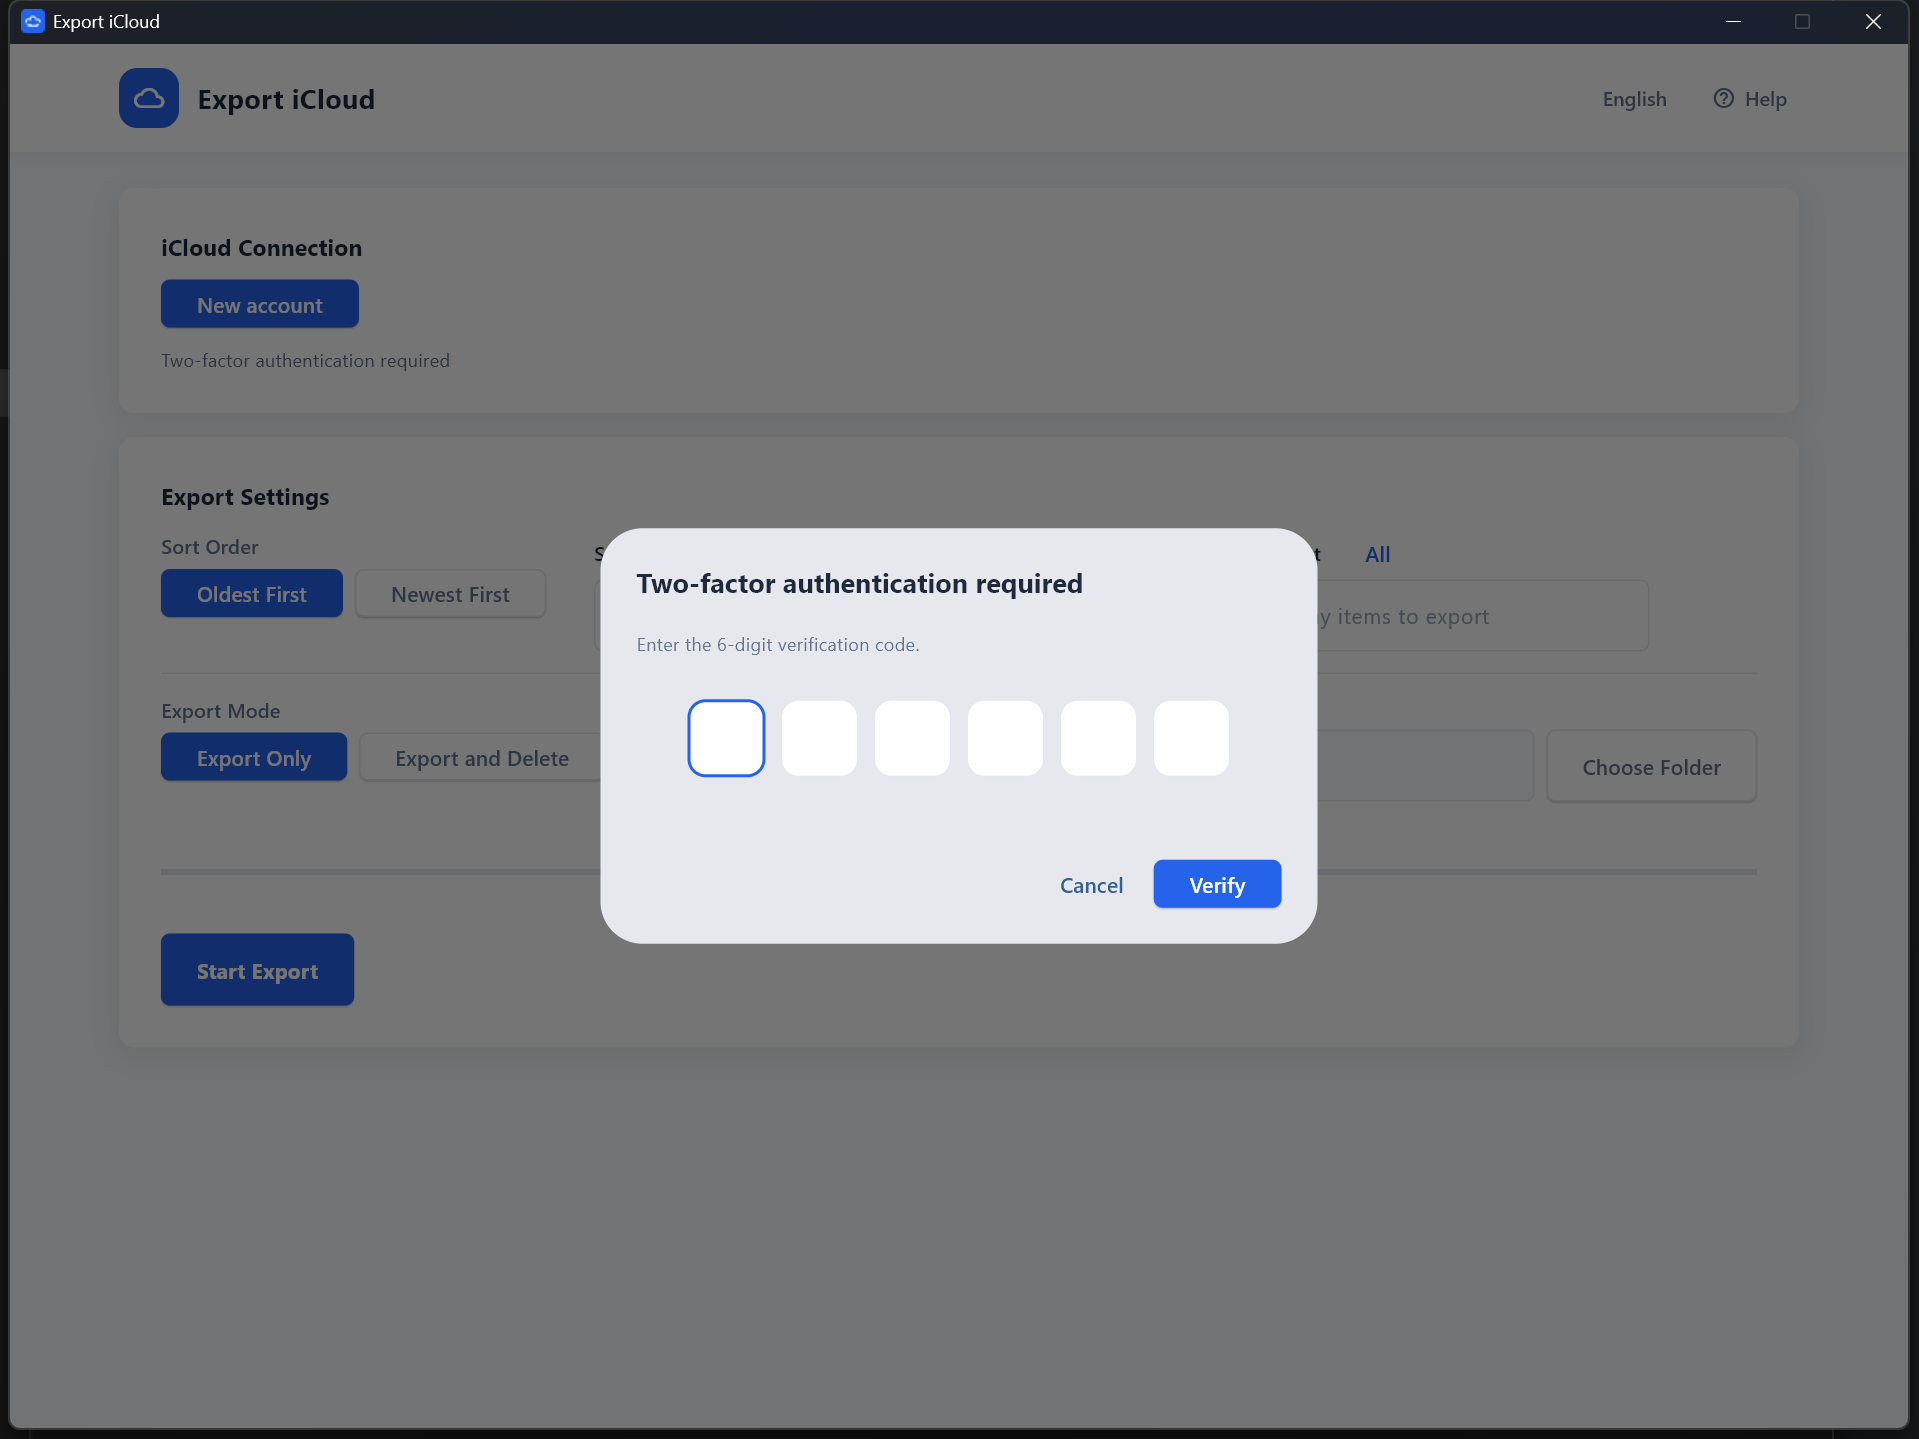
Complete secondary verification
If Apple asks for an additional verification step, enter the code or CAPTCHA shown during sign-in. The desktop app supports this extra confirmation as part of the normal login flow.
Confirm the connection
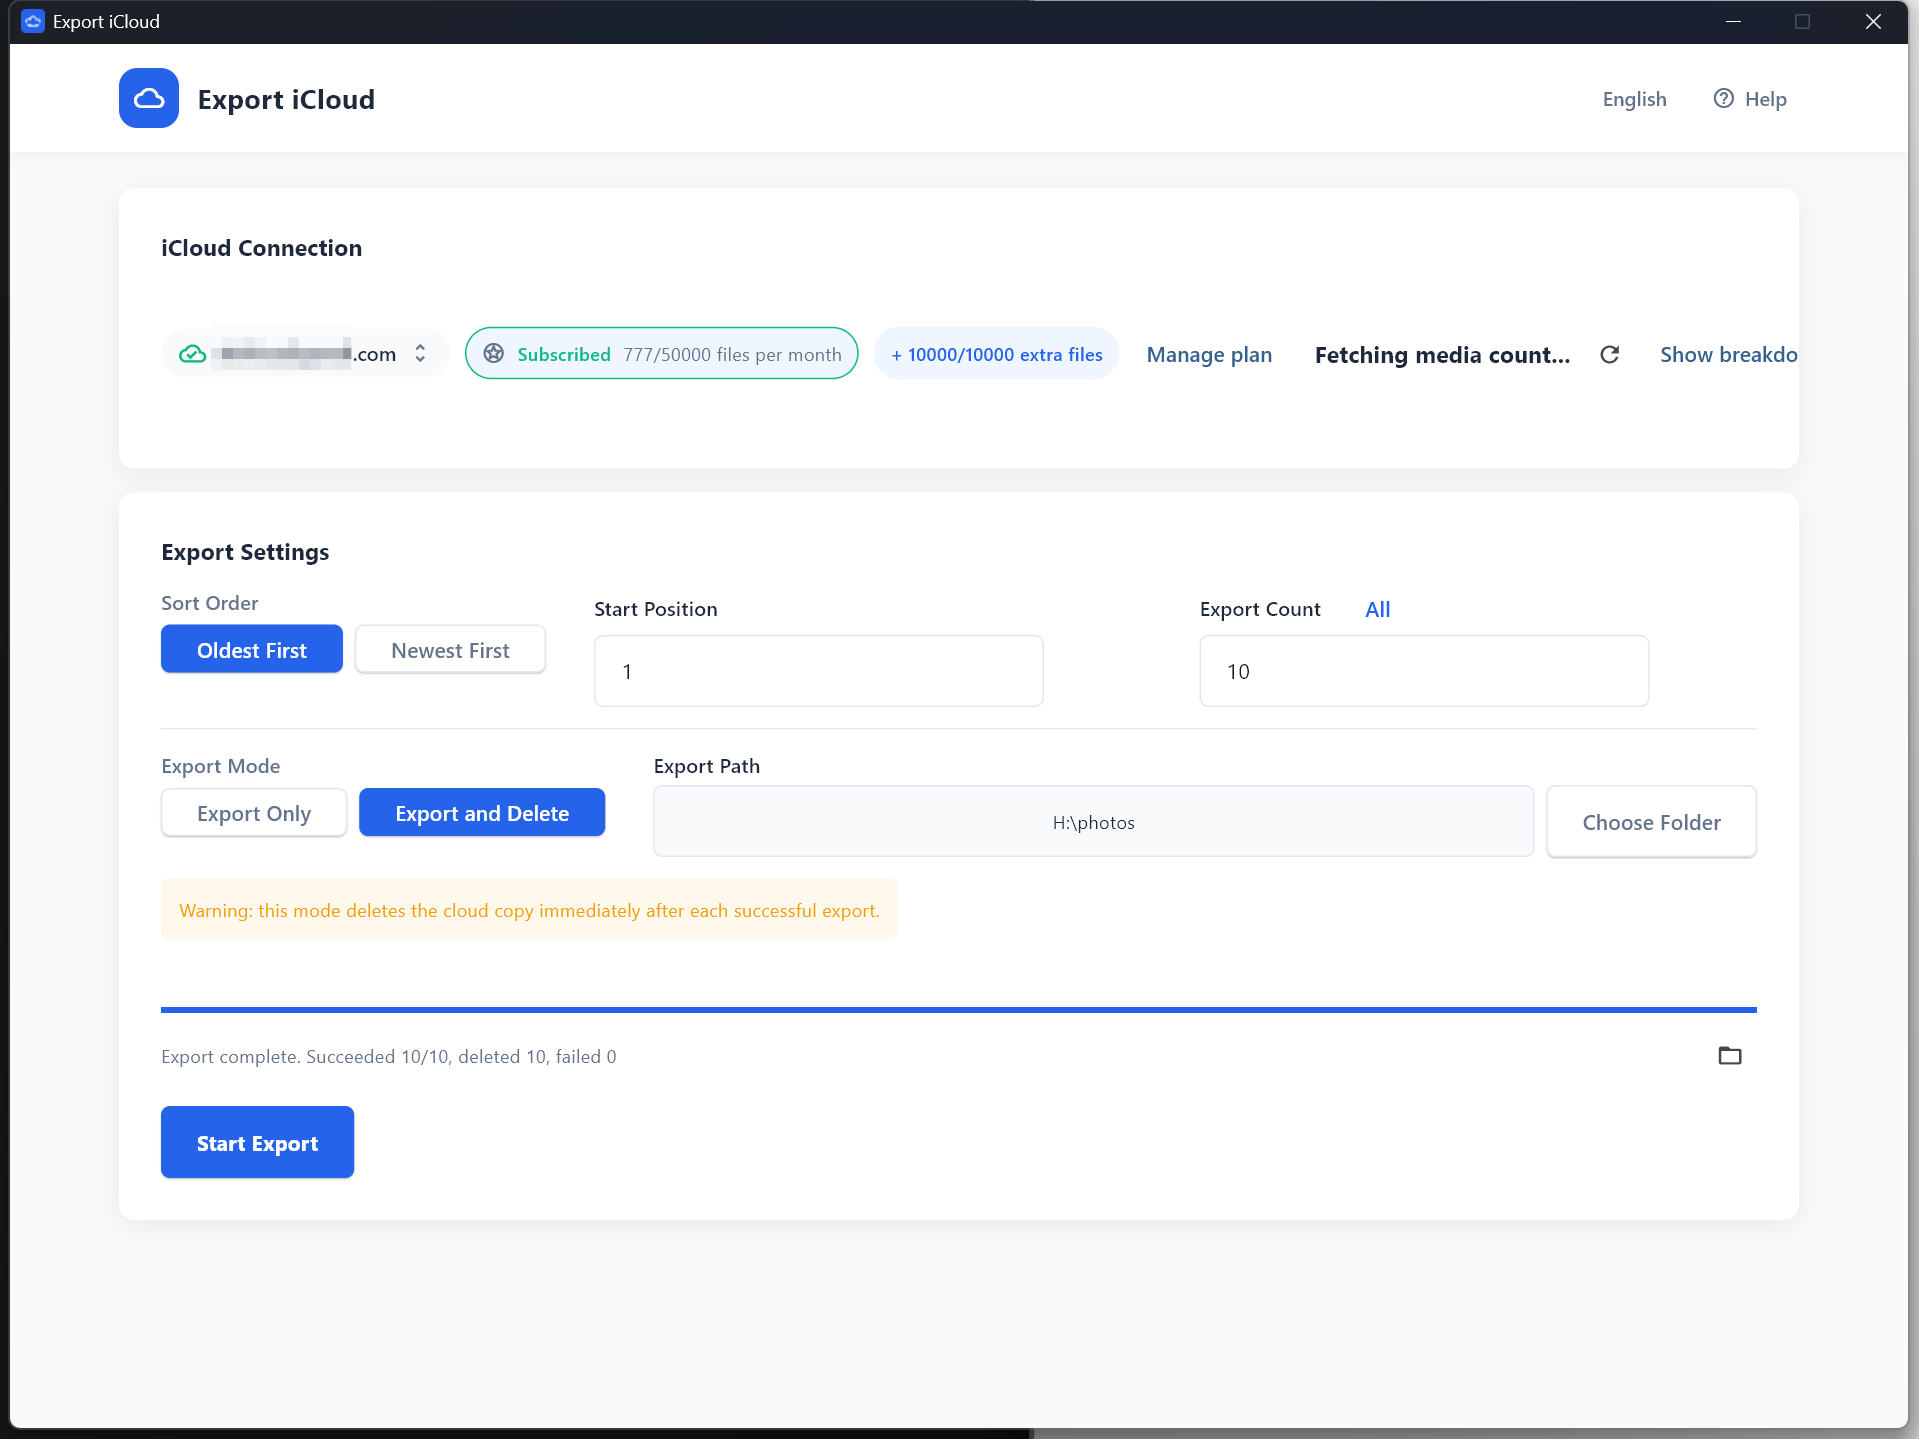
After sign-in succeeds, the desktop app shows the connected state and loads your media totals. At this point you can review the account state and prepare the export settings.
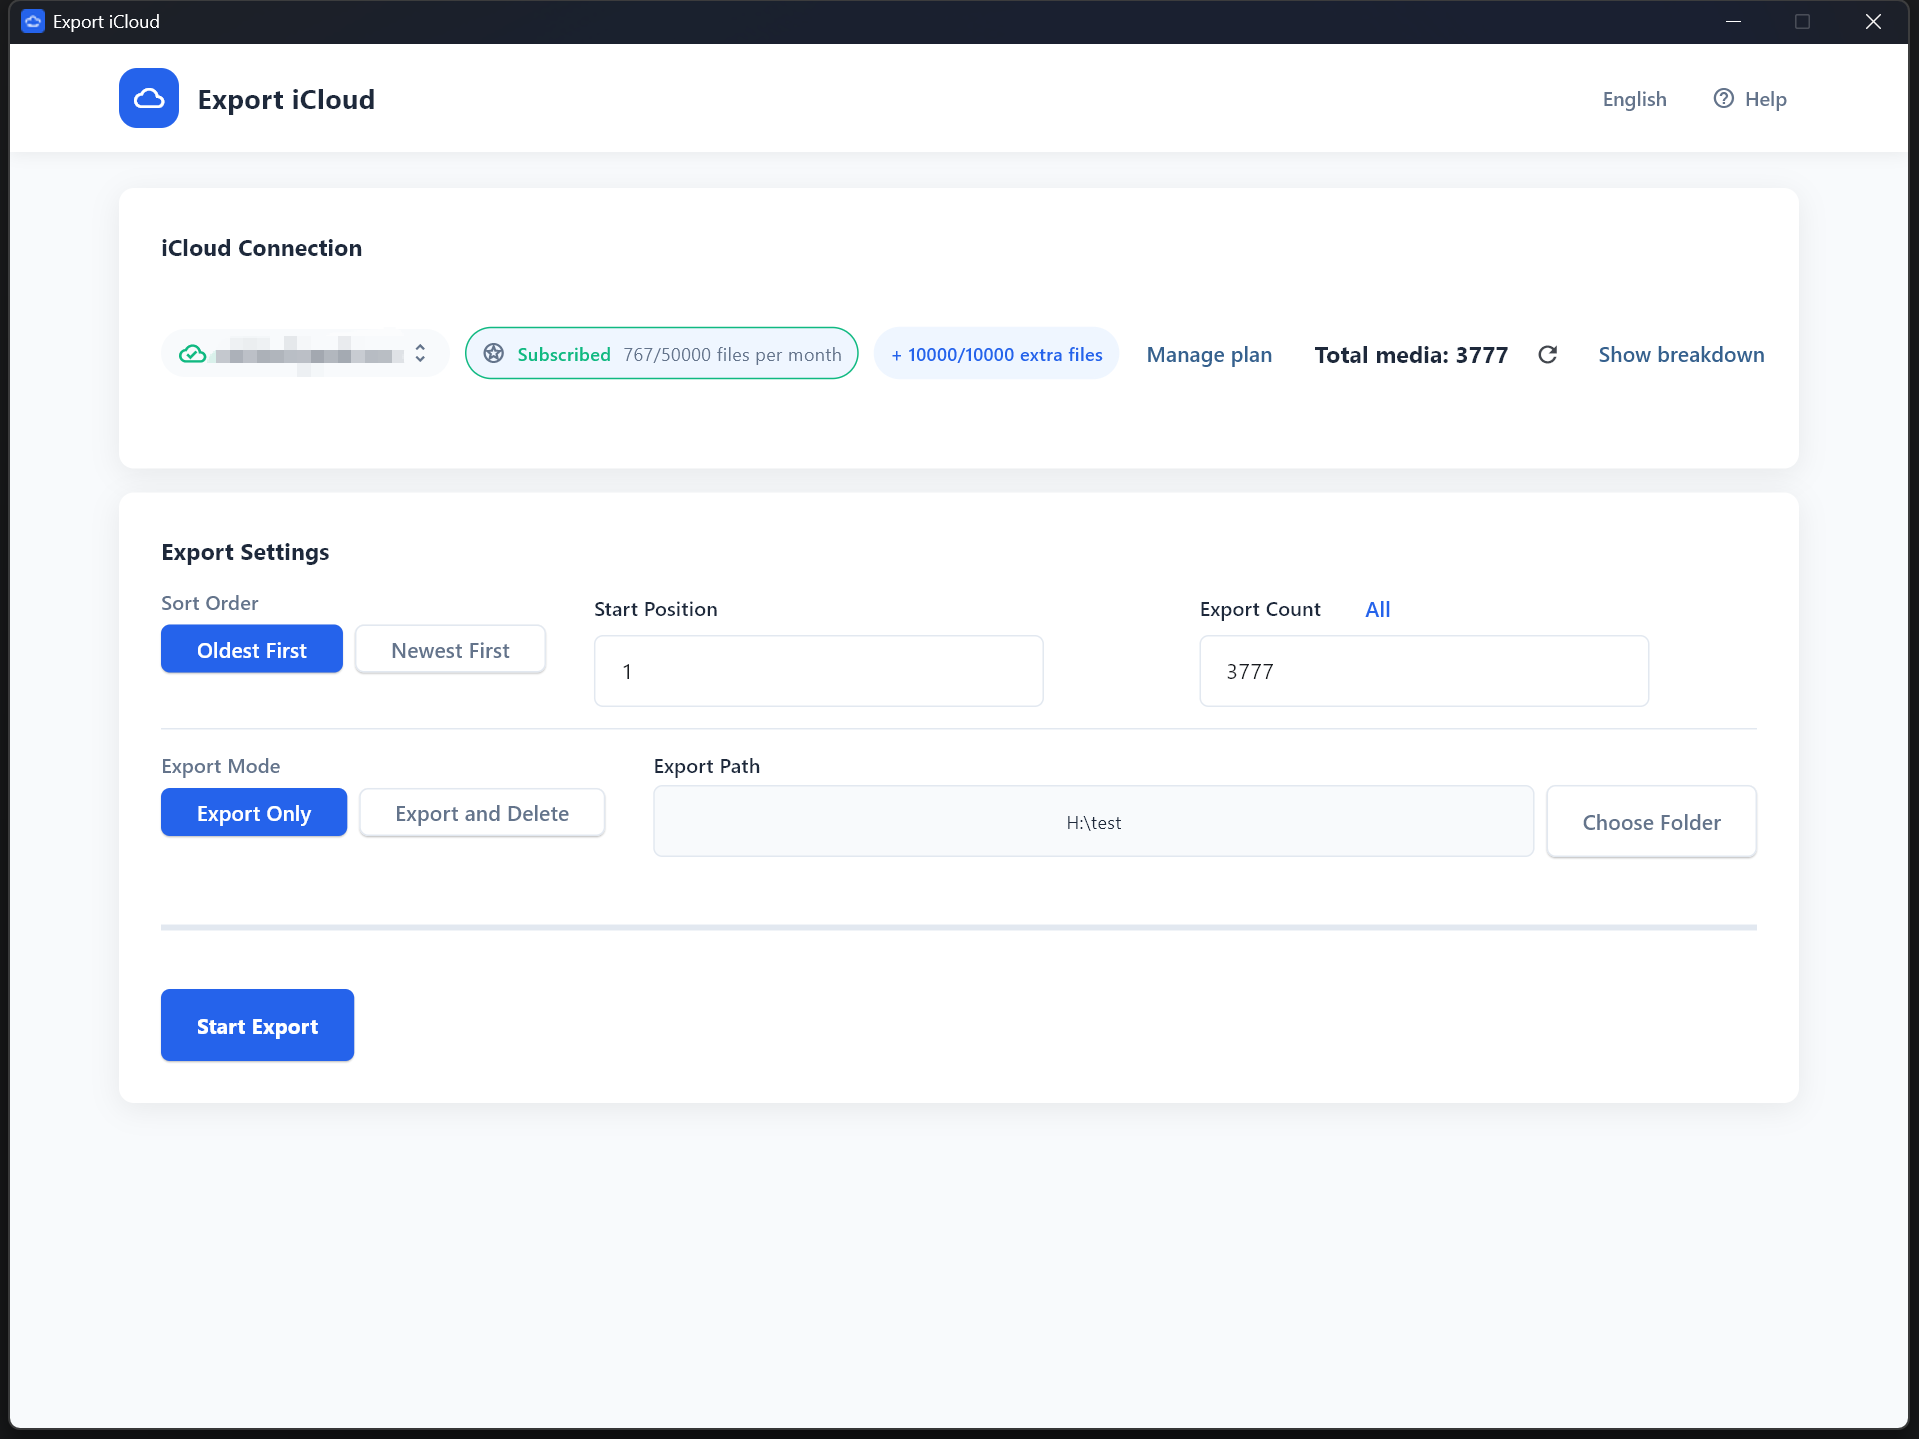
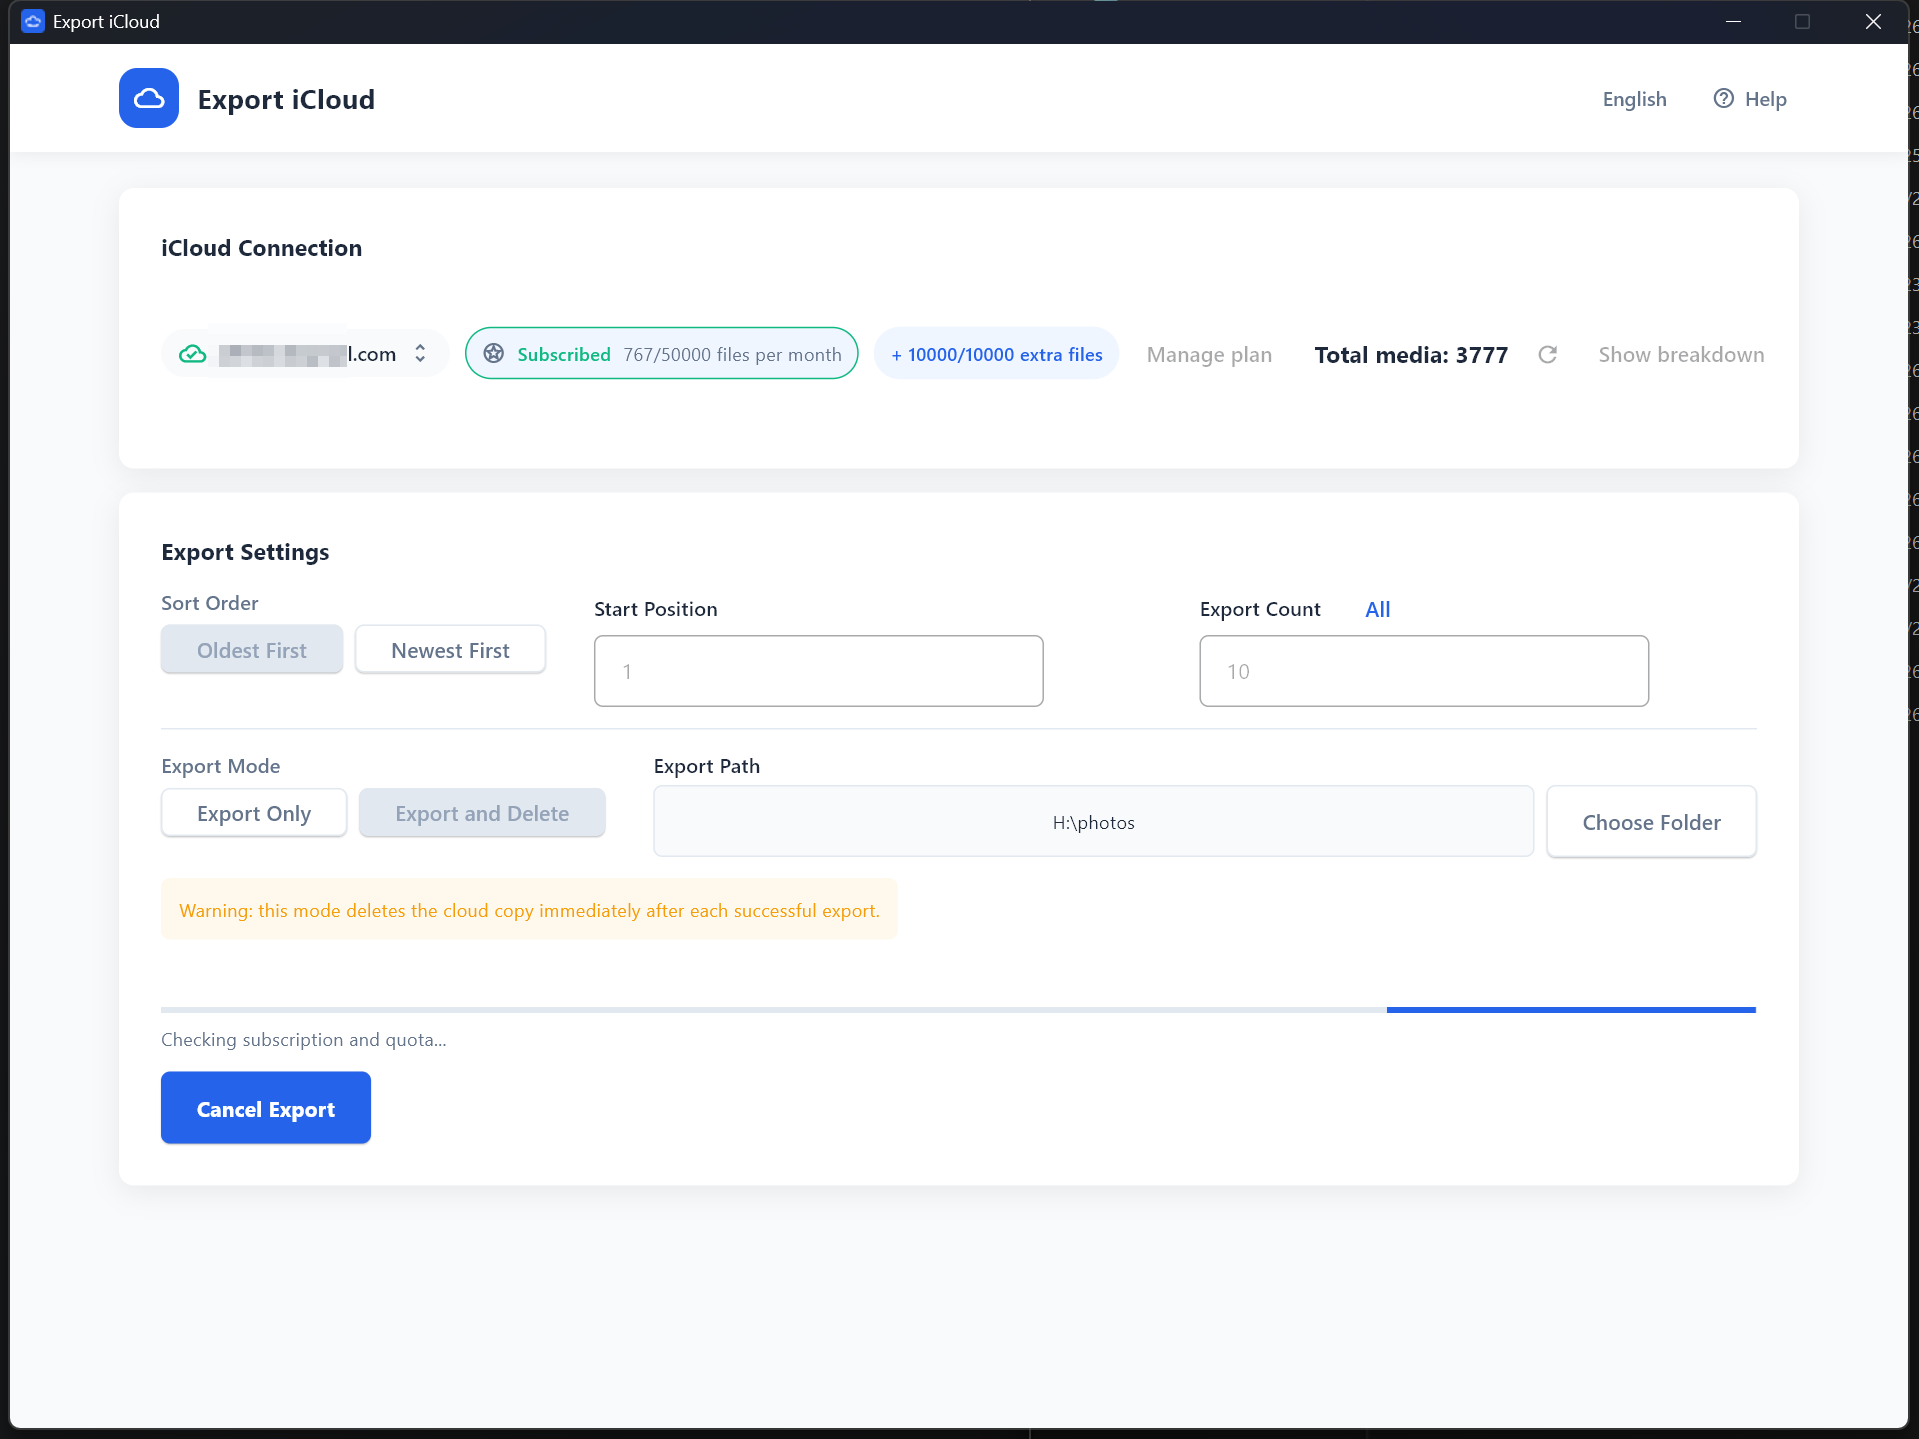
Choose your export settings
Select the export folder, start position, quantity, and export mode. The desktop app checks your current subscription or file-pack balance before the export begins.
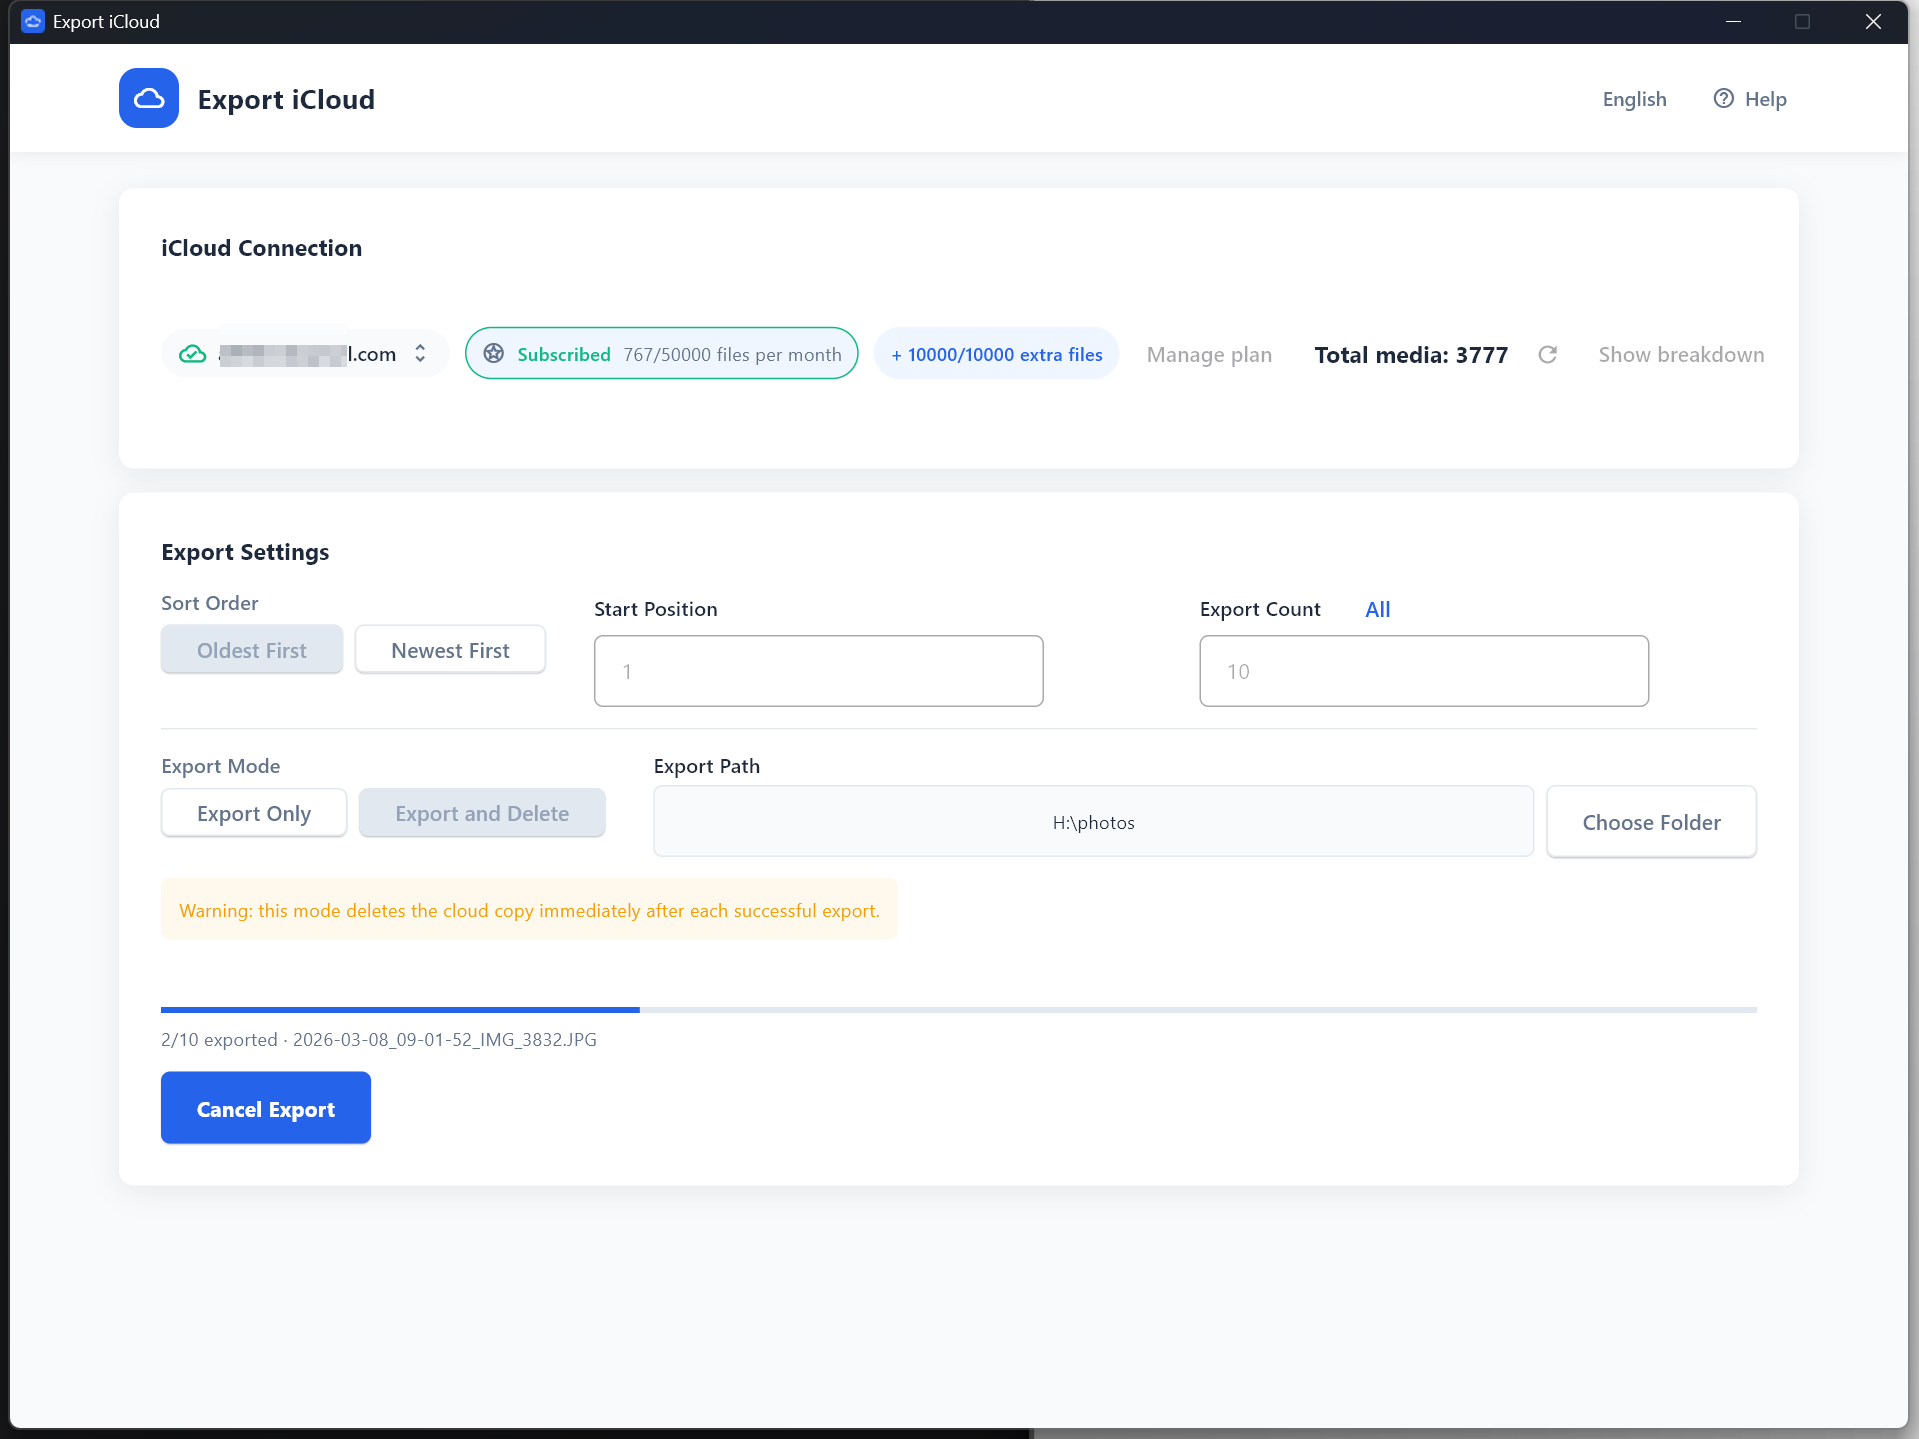
Monitor progress during export
While the export is running, the desktop app shows progress, status, and subscription usage updates in real time. This is where you can confirm that files are being exported successfully.
Review the completed export
When the run finishes, the app shows the completion summary. Review the result, confirm the exported files in your chosen folder, and then continue with another batch if needed.